RobotBit - Robot Expansion Board for Micro:bit

-
Product Code:
SG - SS105990110 Availability:
Pre-Order
-
Price:
S$ 48.90
Qty
Robotbit is an excellent robotic expansion board specially designed (for Microbit, by KittenBot team) for primary school students/training institutions/parents/ enthusiasts as a robotic accessory.
Product Feature
It has a powerful ability to drive DC motors, stepper motors, servos, and onboard buzzer and RGB pixels and release all valid IO from microbit, with support the most common electronics module in the market.
It comes with 18650 battery holder, integrated lithium battery boost, charging and protection chip. Support for external power input. Mechnically support for KittenBot robotic chassis and LEGO technical slots.
The powerful drive capability and built-in battery make DIY more convenient and free. We have received unanimous praise from the school teacher training institutions and individual enthusiasts. It is an excellent choice for your robotic projects based on Micro:bit!
Hardware interface
1. 5V external power input(with anti-reverse protection)
2. Power switch
3. Power Indicator
4. Battery Indicator
5. Micro USB charing port
6. 4-channel DC motor / 2-channel stepper motor
7. Jumper for buzzer selection
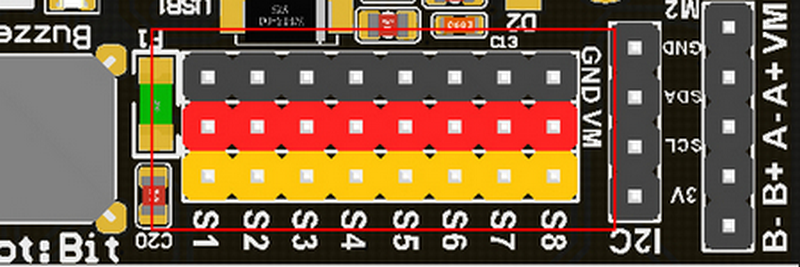
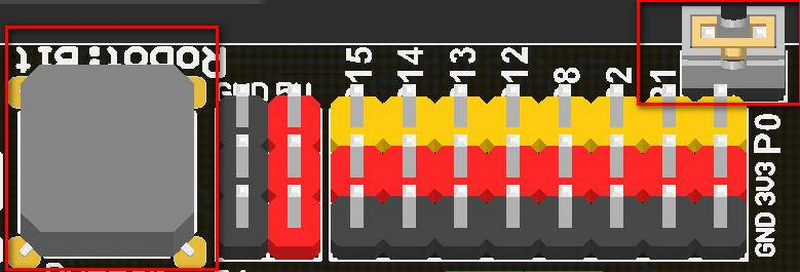
8. 8 channel IO(corresponding to Micro:bit P0-P2、P8、P12-P15)
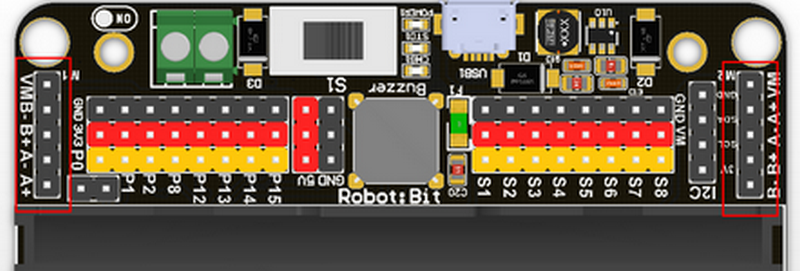
9. 5V and GND port
10. Buzzer
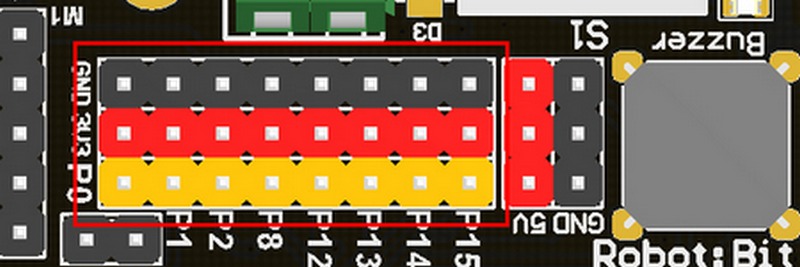
11. 8 channel servo port
12. I2C interface (expandable I2C module)
13. 18650 battery case
14. Bettery protection recovery push button
15. Micro:bit edge connector
16. 4x RGB pixel

17. Servo driver (PCA9685)
18. 2xDc/Stepper driver (DRV8833)
19. KittenBot robot chassis mounting hole
20. Standard LEGO hole

Supported software
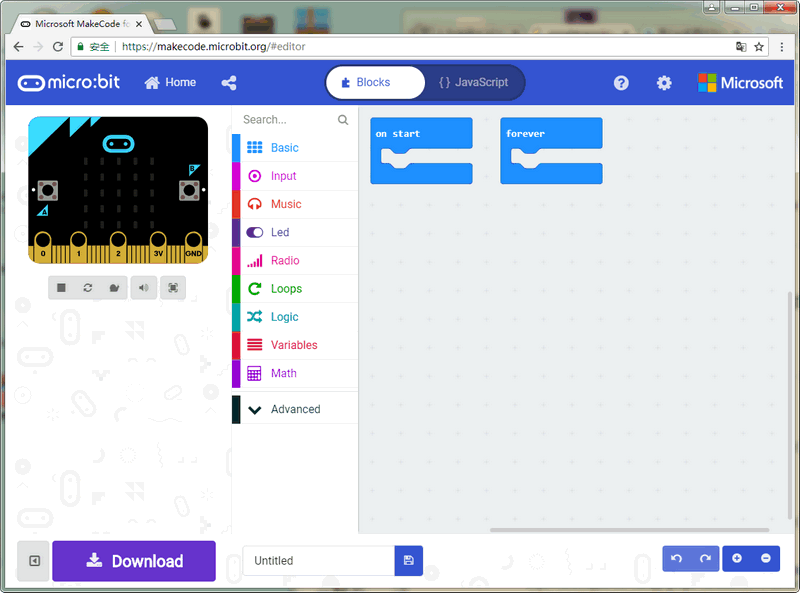
Available Coding platform: Kittenblock(based on Scratch3.0) or Makecode and python(Mu editor in microbit mode)
MakeCode from Microsoft
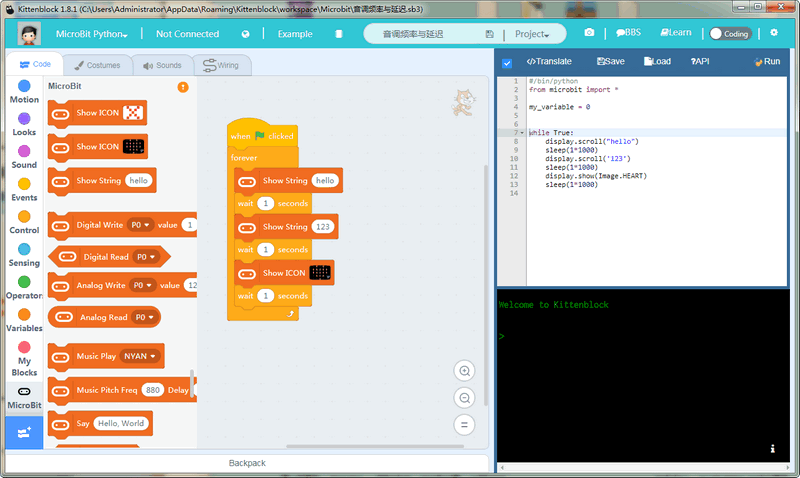
KittenBlock(Developed by Kittenbot Team based on Scratch 3.0)
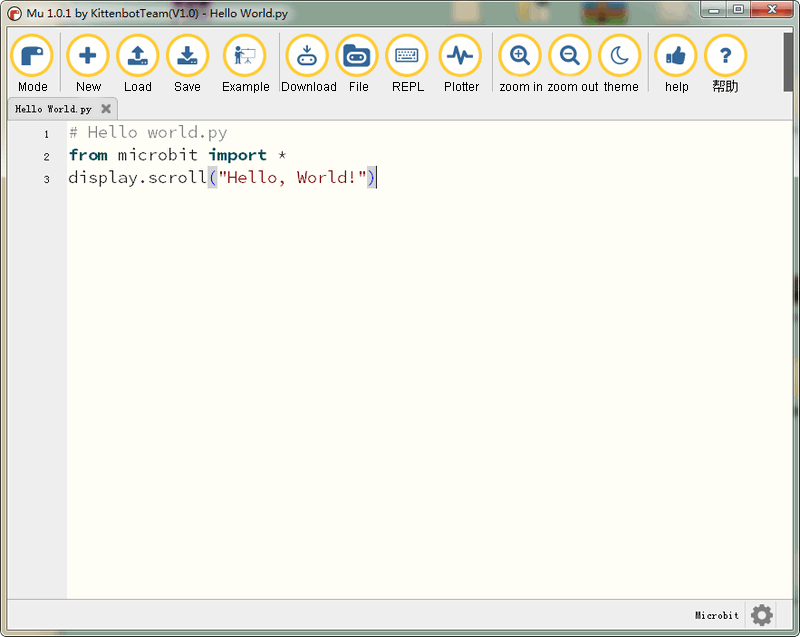
Python
If you’re used to code programming and want to get started by microbit python you have two options, directly Mu Editoror kittenblock in micropython editor mode.
The above detailed tutorial can be found from our learn website for self-learning. If you encounter problems during the learning process, you are welcome to get us at our bbs or slack channel.
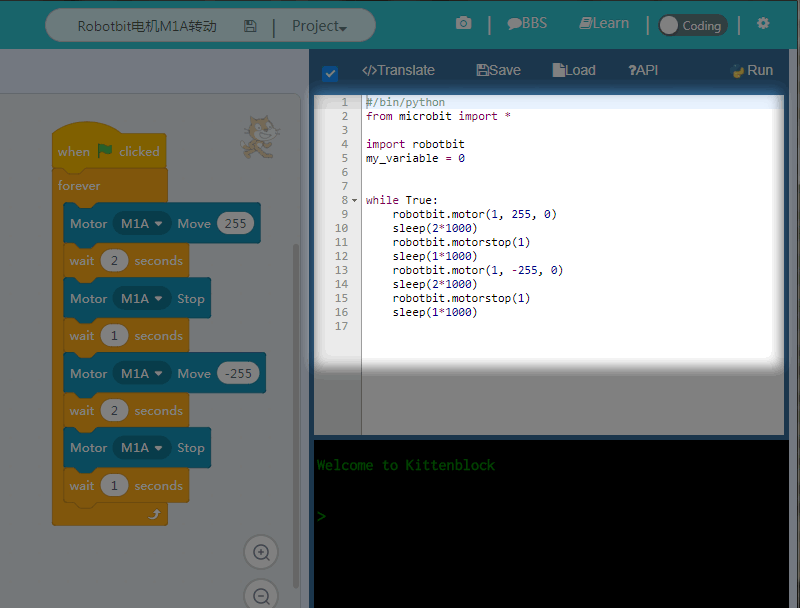
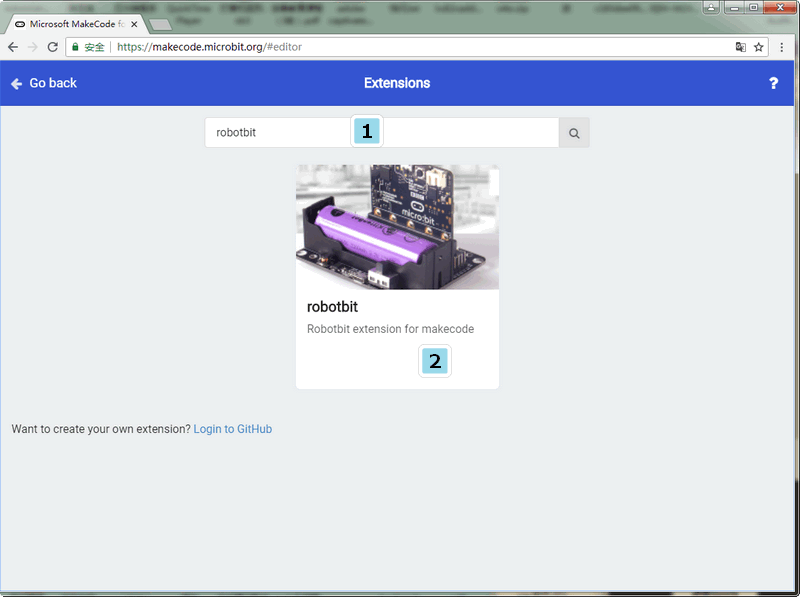
Makecode Extension
In makecode add extension panel directly search Robotbit. In our offline version of makecode, you may find Robotbit in the default list and other useful extensions.
Robotbit Detailed description
18650 battery case
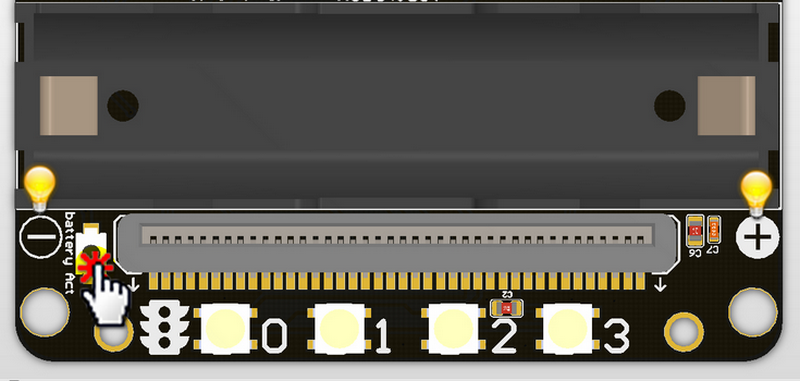
Once you got your RobotBit extension board please first install a 18650 battery, pay attention to the positive and negative pole (even we have anti-reverse protection). You have to activate the power management system by pressing the Battery Act push button. Each time you switch a battery cell or let the power management go into protection mode (over current or over discharge), you have to redo this step.
18650 Power switch
Turn on the switch (in the direction of green terminal input), will provide onboard 3.3V 5V and VM(motors and servos directly driver by battery cell)
Micro USB charger port

Only for charging and not for download! Computer USB host port or any other mobile phone charger which may output 1A or larger should be fine and may take about 2.5 hours to fully charge a 18650 cell. it will automatically cut off once full, no need to worry about overshoot.
Power and battery indicator
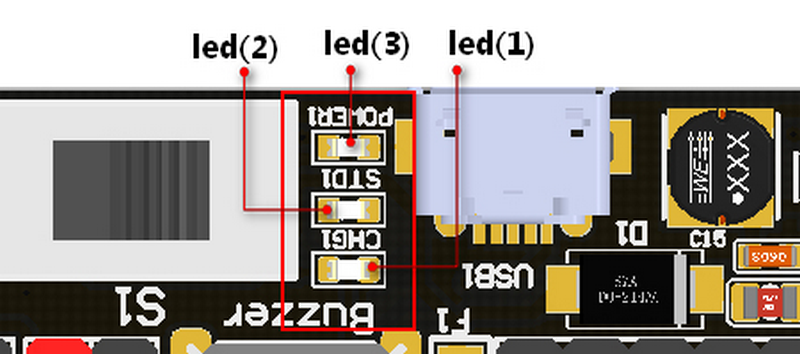
Led(3) is the power indicator, will be always on after switch is turned on. Led(1) is charging indicator, will be on while charing and Led(2) be on once fully charged.
Micro:bit stand edge connector
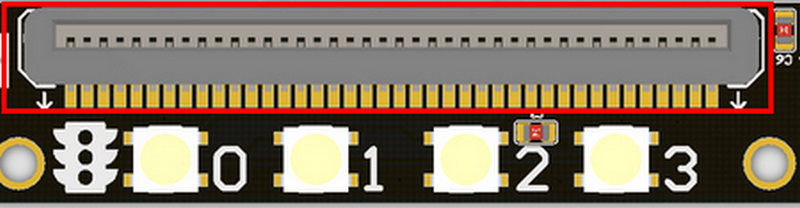
For installing Microbit mainboard. Please install Microbit with led matrix and RGB led in the same direction.
4x RGB neopixel
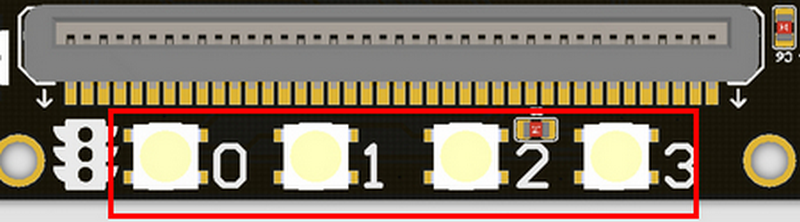
The robotbit extension for makecode has integrated neopixel support. Neopixel array connect to P16 of microbit.
8 channel servo connector
Servos are driven by an extension chip (PCA9685) with the power source from battery or external input.The extension chip communicates with Microbit via the i2c interface, so these S1~S8 interfaces can only be used for pulse output not as common IO. With onboard 18650 battery cell, it may drive eight 9g hobby servo (with maximum current less than 2A). If you plan to use larger servos like MG995 please use an external power resource connect to the green slot (the input still 5V). Robotbit extension has built-in blocks for controlling servos.
4 channel DC motors / 2 channel 28BYJ micro steppers
Robotbit extension has also built-in blocks for DC motors and steppers. With onboard cell you may drive 4x TT motors or 2x 28BYJ steppers, or a mixture of theese. Keep in mind that VM may out 2A to motors and servos. If you use external source please keep the input around 5V or less, a high voltage external input may damage the 5V boost circuit.
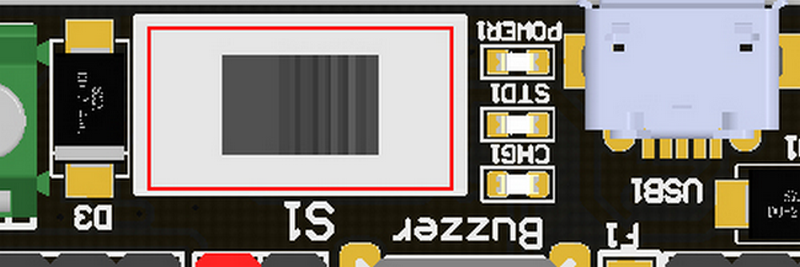
Buzzer and the selection jumper
The buzzer jumper cap is plugged in by default, and the corresponding buzzer is connected to the Micro:bit P0 port. If you need P0 for other purposes please unplug the jumper. The buzzer associate to music blocks in makecode.
Micro:bit IO
We have released P0-P2、P8、P12-P15 from Microbit to Robotbit for common IO usage. P0~P2 has analog read/write support, others may act as digital IOs. You may connect commonly modules for Arduino to Robotbit, there is also 5V output in case your module only support 5V power input. Please note that Microbit IO signal level is 3.3V.
I2C Interface
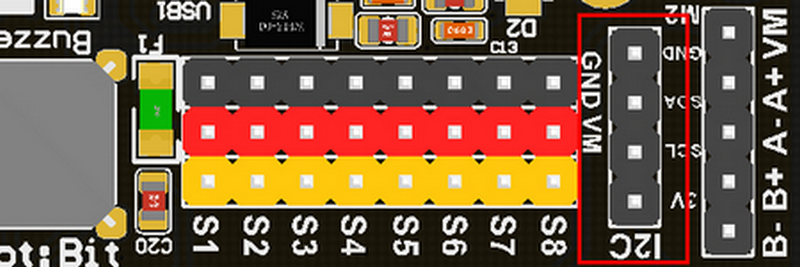
Expandable I2C module, can only be used to plug in I2C module.
2PIN External Power Input
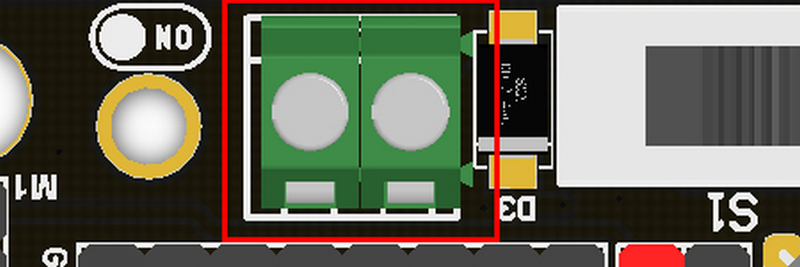
Although there is anti-reverse protection, but still pay attention while wiring. The positive and negative silkink of this interface is on the back of Robotbit. You can only input 5V or less into this port. If you have a higher voltage source you may need a LDO or DC-DC module to buck the voltage down.
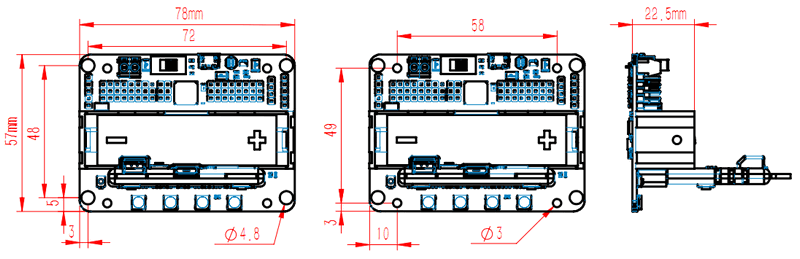
Product Parameters
Dimensions: 78mm x 57mm x 23mm
PCB Thickness: 1.5mm
Small mechnical hole: 3.0mm
Big mechnical hole: 4.8mm
Net weight (without packaging): 37.5g
Functional parameters
18650 battery voltage: 3.7V
USB input voltage: 5V
VM pin max ouput: 1A (with onboard battery)
External Voltage Input (the green termial): 5V (only supports 5V input, do not connect over 5V, maximum current supports 3A)
Part List
RobotbitV2.0 x1